Stunning photo-enhancements can often be a daunting task for early Photoshop users. What many people don’t realize is that you doesn’t need incredibly brushing skills or excessive use of filters and expensive plug-ins to make a plain image look amazing. Professional results are possible with some simple, easy to follow steps and make for a good first step in more complicated techniques later on. If you are seeing Photoshop Tutorials for the first time here on our website please dont be surprised. There are many more quality tutorials coming soon. We are currently looking for more authors. Lets Get on with the Tutorial. Photoshop PSD Source Files for this tutorial for learning purpose.
Exclusive Download!
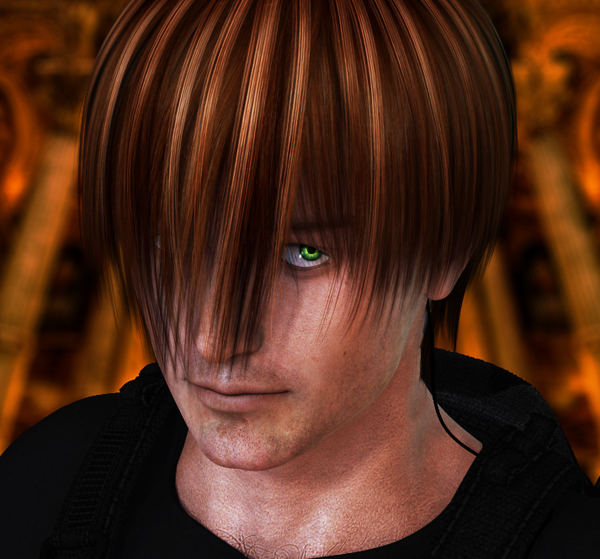
Final Preview of The Image
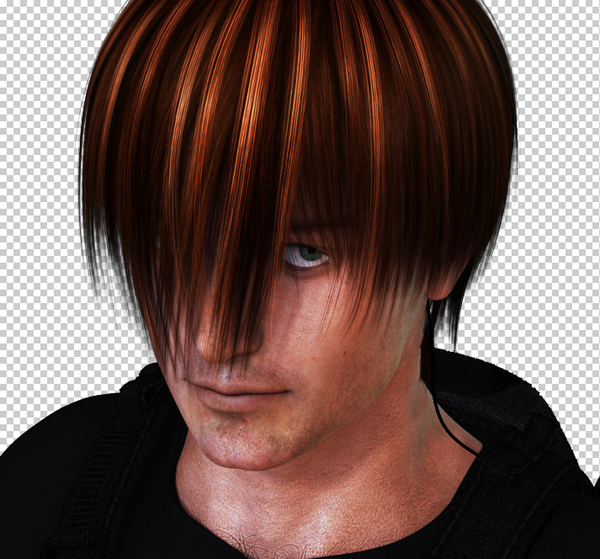
What we’re seeking here is to bring out the natural details in the image by enhancing the colors, light, and shadows. I’m going to start off with a simple 3D portrait with a transparent background, however the techniques shown below will work perfectly fine with photographs as well, with and without backgrounds.
 . It’s always a good idea to keep the original image layer around for later use in all of your projects, if something goes wrong you will have instant access to the original image for easy corrections to the altered layers.
Next we’re going to enhance the colors and details of the image by use of the Overlay blending mode. Duplicate the Base layer, label it “Base Overlay 1” and change the blending mode to Overlay. Duplicate this layer and label it “Base Overlay 2”. Duplicate this layer, name it “Base Screen 1” and change the blending style to Screen.
Step 2 – Light Correction
We can already see the colors and details looking more vibrant in the image, but now its time to fine tune them. First of all, the image is looking a bit too bright for my tastes, so we’re going to lower the opacity of the Base Screen 1 layer. The amount that you lower it to greatly depends on the image, so change it to what looks best for your image. In this case, I’m going to lower it to 35%
We’re also going to slightly lower the contrast by lowering the opacity of the Base Overlay 1 layer. Once again, change it to what looks good for your image; in this case I lowered mine to 85%.

Step 3 – Color Correction
Now we’re going to soften the colors a bit for added realism. First of all select the Base Overlay 2 layer and press Ctrl+U. Lower the Saturation slightly to soften the colors of the skin, I used -20.
Also, the hair is looking a bit too dark and the colors look unnatural. Select a 120 pixel circular eraser
 with a Hardness of 0% and select the Base Overlay 2 layer. Start erasing the hair from that layer until the color looks softer. If the hair looks too light, do the same but on the Base Screen 1 layer instead.
Step 4 – Eye Color
The eyes are one of the most critical parts of a good image. Stunning eyes can make a mediocre image look amazing, and bad eyes can make a great image look terrible.
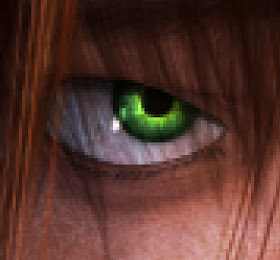
First off we’re going to change the color of the eye, so create a new layer and label it “Eye Color”. Take the elliptical marquee tool
 and circle the iris as shown.
Next select the polygon lasso tool
 and hold down the Alt key. Use this to cut away the area of the selection that appears on the eyelid. Go to Edit>Fill or Shift+F5 and fill the selection with white. Change the blending style to Overlay and then go to your styles window.
 Select Inner Glow from the Styles menu, change the Blend Mode to Normal and the color to black. Adjust the Choke and Size to give the eye a thin black ring around the edge of the iris. For larger images, larger values than shown will be necessary.
Go to Color Overlay and change the Blend Mode to Overlay. Adjust the color to whatever you want the eye to look like, I used #68be74. Click OK and go back to your layer menu. If the eyes are looking a bit too bright, you can lower the Fill% of the Eye Color layer.
We’re going to add a bit more interest to the eye by adding a secondary color around the pupil. Start off by creating a new layer and labeling it “Eye Inner Color”. Grab the elliptical marquee tool again and draw a circle around the pupil of the eye. Go to Edit>Fill (Shift+F5) and fill the selection with black.
Open up the Styles menu and apply an Outer Glow. Change the Blend Mode to Color Dodge and select a color that adds well to the eye color, I chose a nice yellow (#ffd800). Again, larger images will require larger Size and Spread values.
Right click Effects on the Eye Inner Color layer and select “Create Layer” from the drop menu. This will separate the effect from the layer and allow us to directly edit the effect. If the Outer Glow effect is showing up on the eyelid like in this example, grab the Polygon Lasso tool again and remove that portion like shown in Step 4. Ctrl+Click the “Eye Inner Color” layer, select the “Outer Glow” layer, and press the Delete key. You can now delete the “Eye Inner Color” layer.
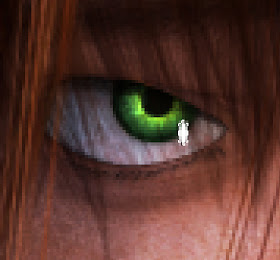
Step 6 – Eye Specularity
Eyes are naturally moist and slightly reflective, but our eye looks a little dry. By adding a specular highlight, we can make the eye look more moist and natural.
Create a new layer and label it “Specular”. Grab the Elliptical Marquee tool
and draw a small oval on the eye. Edit>Fill (Shift+F5) and fill the selection with white. Now press Ctrl+T and rotate ellipse about 20-45 degrees. Press Enter and confirm the transformation.
Now drag the ellipse over to the edge of the iris if it’s not already there. Change the Blending Mode to Overlay and duplicate the layer.
Step 7 – Background
So far this tutorial has assumed you have a transparent background. If you already have a background you can skip this step.
Click on the “Original” layer, and create a new layer labeled “Background”. Now it is time to select a background for your image. Try to pick something that fits the lighting of the subject for best results. For example, the tones in this image are rather warm, so a blue, nighttime background would probably not look very good. Also try to look for an image that is the same size or larger than the starting image. One can always scale down, but scaling up often looks blocky and of poor quality. Google Images is a great place to look for backgrounds, just be sure to check and make sure that you are allowed to use the image first, and give credit when due.
The image I chose was a wonderful cathedral image that matched the color palate of my image rather well. I found it at http://www.flickr.com/photos/stuckincustoms/2081335589/
Next we’re going to add a bit of blur to the background in order to make it look as if the camera is focusing only on the foreground. There are more advanced ways to pull this off using brushes and plug-ins, but for the sake of simplicity in this tutorial we’re just going to use one of Photoshop’s filters. Go to Filters>Blur>Lens Blur. Change the quality from Faster to More Accurate, it may take a bit longer to calculate, but the increase in quality is worth it. The shape is entirely up to you, generally I like Hexagon but it’s really up to personal preference. Don’t go too crazy with the blur radius, in most cases less is more, so I went with 20 pixels.
Now duplicate your background layer 3 times. Set the middle two layers to Overlay and the top to Screen. Here is where you really need to play with the Opacity and Saturation (Ctrl+U) of each layer in order to get the color and lighting to work best for your foreground. In this case I set the top Overlay layer to -100 Saturation and lowered the Opacity of the Screen layer to 80%. I also selected the bottom Overlay layer, Ctrl+U, checked the “Colorize” box, set the Hue to 0 to give it a reddish tone, and upped the saturation to +60.
Finished Product
Here is our finished image, already a huge improvement from the original image. This is a great process to enhance all of your images and a great starting point for more advanced techniques and effects. I hope you enjoyed this tutorial and I wish you the best of luck in your future Photoshop endeavors.

Evan J is a 22 year old college student majoring in Civil Engineering. I got my start into the art scene at age 13 when I first downloaded a copy of the 3D program, Blender. Photoshop came soon after in an attempt to enhance my 3D renders. With that said I’ve been working in both 3D artwork and Photoshop for nearly a decade mostly as a hobbyist. Catch up with him on DeviantArt.


Superb!!!! Bookmarked!!!!
ReplyDeleteThe Photoshop PSD file you provided is useful for learning purpose thanks a million.
ReplyDeleteThanx, Cheth for sharing... :))
ReplyDeleteHey,
ReplyDeletethe techniques you used for your image refining were new to me and seem to be very useful. Though I don't like the base photograph, this steps should work well with other images as well!
Ceep on working!
My blog project: http://momentanaufnahme.patlkli.org/
I agree with the above comment! I didnt like the base photograph. Maybe I expect too much from your blog. Hope to see something even more nice next time! :-)
ReplyDelete